

A slice of my golden velvet tart
You're probably wondering, "What the heck is a golden velvet tart?"
Yeah, I know. You've most likely never heard the name as any established dessert title. Sure, there's red velvet cake and many creative spins on that traditional recipe such as blue velvet and the like, but the title of my dessert is not only a tart, but a custom cute nickname that I felt was appropriate.
My dessert is a butternut squash tart but with extra ingredients that give it a distinctive flavor presence. So, it's not a simple and plain butternut squash filling...although that's still good :p
I've enjoyed butternut squash for years and it's one of my favorite vegetables. In the past, I've made creamy, aromatic soups with it, but I never used it for cakes, pies or anything else sweet. This doesn't mean that the idea didn't cross my mind...many times. Like with many culinary projects, I just never got around to it.
So...finally...I have. *confetti and balloons suddenly appear with a cheesy baritone-voiced interviewer*
Info: Butternut squashes come in two shapes: vase and bell. It is a one of the best squashes to use in recipes because it can be found year round in most supermarkets, so it's rather accessible and affordable. The flesh is sweet, creamy and non-stringy when baked. The skin is sturdy and not so easy to peel away when the squash is raw, which is why most people find it easier to bake or steam the squash and then remove the tenderized skin, which comes off easily. This squash can be baked, grilled, fried, boiled, or steamed. To get the best flavor out of the vegetable, baking or toasting (in the oven) is best. Butternut squash is ripe when it feels heavy for it's size and when tapping on the squash produces a hollow sound. Make sure the stem of the squash is intact, the skin looks matte and smooth, and avoid squash with lots of blemishes, dark spots and slashed skin. As mentioned before, the skin is known to be tough when raw, so a healthy squash should not be easy to scar with a fingernail alone.
This would also be the first time I am using a tart pan I recently purchased from Surfas. I've been waiting to break it in. Originally, my first tart dessert was going to be a salted chocolate tart (although I've since made a chocolate rum tart I'll be blogging about soon). I am in love with bake ware, especially tart pans. The traditional shape and size is round and 9 inches in diameter, but there are so many shapes and sizes. I've seen rectangles, huge circles, small circles, equilateral squares, non-crinkle, and even custom shapes like hearts, wide apples, and wavy rectangles. I get googly-eyed when I see tart pans on store shelves in what seems like endless stacks of different heights.
So, let's talk about what I did, shall we?
For starters, I halved (with careful effort) a butternut squash and removed the seeds and strings around them. The smell of the vegetable was intensely dewy, sweet, and pungent with a deep buttery note. The odor was reminiscent of a melon, yam, and a pumpkin, but in fusion. The flesh was very orange and lively in color

I baked it in the oven until the flesh was very tender and the skin easily slipped away. The next step was taking the flesh and blending it into a beautiful puree.


As you can see, I was able to puree the pulp into a lush blend. I can see why so many people find it ideal for baby food or soups. Once you get it to this state, you can do so many cool things with it. I tasted the puree and found that it was quite sweet on its own, and I don't mean in that acquired sense. Most people would agree that ripe squash puree is very sweet, making it a great base for desserts...or perhaps even a dessert on its own.
I referred to the ingredients I had arranged on the counter, and began adding them in to convert the squash puree into velvet gold.


In this order, I enriched the puree by adding, while still very warm: butter, brown sugar, vanilla bean paste, spices (nutmeg, ginger and clove), heavy cream, cream cheese, one egg and some flour.
The flavor of the batter was opulent, to say the least. Very decadent and flavorful. The color turned from vivid orange to a matte gold. The texture was indeed velvety and creamy.
Now that my filling was complete, it was time to begin making the dough for my tart crust. I've described this process a bit in my entry for my cherry pie. However, I took more photos of the dough-making for this baking adventure.
The first step was taking the butter, browning it and infusing it with a vanilla bean. After the butter browned, I placed it in a glass prep bowl, with vanilla bean still intact, for chilling in the refrigerator. Below, I've included some photos of the brown butter while hot in both the saucepan and in a Pyrex prep bowl and after it solidified in the fridge.


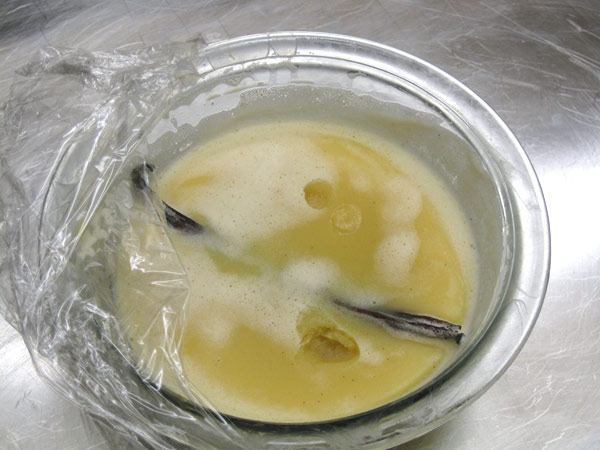
The smell of the butter would drive anyone into a state of mad euphoria. It truly is exhilarating. Seriously, there should be a gourmand perfume based on the smell of brown butter and vanilla. I'd buy that in a heartbeat and add it to my collection of edible scents. If there ever is a scent like this released, remember, you heard it here first, people! LOL
So after my butter was set, I began the flour work.

Laying out flour


Adding in the cold browned butter and breaking it down in the flour


Added water, shaped the dough into a round clump and wrapped it for half hour refrigeration
After refrigeration, it was time to take the dough out and begin what truly is the magical part - the stage that gives the pie the defining texture once it has baked, and allows the butter to do what it does best in the flour.
 |
| Rolling out |


I call this process "layering and stacking" and I do it many times over. I roll the dough out, stack the edges on both sides, roll it out again and restack. As I do this, I build layers within the foundation of the dough -- layers of butter that will create a very flaky pie crust when the dough is baked. Take a look and see what I mean by the layers that are created within. I snapped a good photo of the result when I cut the stacked dough in half to get a cross section view, once I was done with several rounds of layering and stacking.

The dough was placed back in the fridge (I halved the dough as I doubled up the recipe for leftover) and after another half hour, rolled out for fitting into a tart pan.
 |
| Nice and smooth but with layers of butter within |
 |
| Eggwashed |
 | |||||
| Filling poured in and "dressed" with light sprinkles of nutmeg |
 |
| Final result (including the slice presented in the entry) |
What I'd like to do is buy more tart pans...but in different sizes and shapes. A square tart would be so cute. I can see making a strawberry tart of some kind in a square or heart pan. That's certainly on my baking to-do list.
I hope you enjoyed peeking into the process of making this golden velvet tart. I had a great deal of fun making it, enjoying the experience from beginning to end. The taste results were exquisite. Somewhat similar to sweet potato pie and pumpkin pie but with a style all its own that deserves distinction. This would be an ideal dessert for the holiday season because of the spiced flavor, but for me, it's good anytime!


No comments:
Post a Comment