.
"Food: Science, Art, Passion, Pleasure, Adventure & Exploration"
.

Wednesday, June 30, 2010

Baking Adventure 12: Muffin-Styled Vanilla Bean Financiers


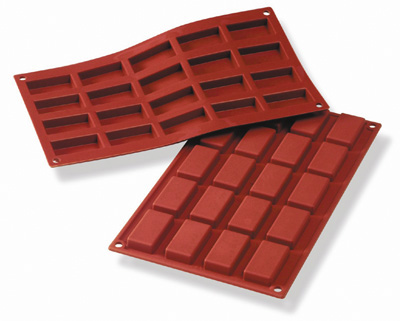
Financiers are little French cakes, often shaped like bars. The traditional bar shape and the golden brown coloring of the cakes are meant to give the cakes the look of small gold (currency) bars. They are dense, mildly sweet like teacake, and they make perfect pairings with ice cream, fresh fruit, and dessert sauces. The recipe is based on the use of almond flour or meal and the distinctive addition of brown butter and powdered sugar.

Speaking of brown butter, brown butter has the most intensely addictive smell and flavor! It adds a deep, heady, buttery-nut flavor to dessert recipes, and its sensual aroma can fill an entire household for hours. This proves what I've believed all along, that smells can also be aphrodisiacs.

What Do You Know?: What is brown butter? Brown butter, also known as beurre noisette or "hazelnut butter" (due to the nutty scent and taste) is simply butter heated on a stove until the milk solids darken, thus turning the butter into a toasty brown hue. Brown butter is often used in French pastry-making and some savory dishes. Regarding the former, financiers, some caramel sauces, and madeleines are some examples of brown butter recipes. While butter melts in a pan, milk solids and the butterfat separate, as water evaporates. The milk solids fall to the bottom of a saucepan and will brown and it is common and normal for foam to appear on top. The clear part of the butter, butterfat, is called clarified butter, or "ghee", which is heavily used in Indian cusine for many curry dishes and as garnish brushed over naan breads. It is also used in Egyptian and Ethiopian cusine.
 
I began this baking adventure by clearing off my counter and gathering all of the ingredients and supplies needed. In the above photo, you'll see eggs, butter, a few vanilla beans, Madagascar bourbon vanilla bean paste, measuring spoons, Pyrex measuring cups and bowls, a metal bowl, almond flour, wheat flour and powdered sugar. What you don't see here is the baking tray I used. It's a muffin pan. As mentioned above, financiers are usually shaped like gold bars, which is traditional, so they are often baked in silicone financier molds. The second most popular shape is the muffin-round shape that I've chosen to give them.

Financiers are easy to make, but because of the addition of almond flour, they can be somewhat expensive to make. I decided to buy my almond flour, rather than making it myself. I am absolutely fascinated with nut flours and would love to try experimenting making flours out of various nuts for different flavor results.

Here are more of the results and the recipe I used for the financiers:


Vanilla Bean Financiers

1 and 3/4 cup powdered sugar
2/3 cup almond flour/meal
1/2 cup + 1 tsp flour
5 egg whites (room temperature)
5.5 oz butter (to brown)
1 vanilla bean 
1 tsp vanilla bean paste or extract

  1. Get a small saucepan and melt the butter on medium-low heat, stirring occasionally to keep the butter from scorching at the bottom
  2. As the butter continues to melt, split open the vanilla bean pod with a knife, to expose and scrape the seeds, and place both the seeds and the entire pod in the melting butter to begin infusing the butter with vanilla flavor. (This will begin to fill the surroundings with an intoxicating fragrance.)
  3. Take the butter off the heat and set it aside, once it reaches a toasty brown color, not "black" (If "black", this is called beurre noir or black butter, when milk solids turn a very dark brown, which is used in some savory dishes such as pasta).
  4. Put all of the dry ingredients into a mixing bowl and whisk together for even distribution - almond flour, flour, powdered sugar.
  5. While whisking, add egg whites to dry mixture, one at a time.
  6. Add the vanilla bean paste of extract
  7. Stir the brown butter into the mixture and fully incorporate
  8. Keep the mixture in the bowl and refrigerate for 1 hour, covered.
  9. Preheat the oven at 300-400 toward the end of the refrigeration period
  10. Once set, take the mixture out of the refrigerator and begin spooning evenly into the slots of a muffin pan or bar mold sheet, or any baking tray or mold of your choice. (No need to butter the molds as this will cause your financiers to cook too quickly and burn on the bottom, since they have a lot of butter in the batter already. I certainly know this by trial and error, as my first batch came out this way and I had to redo them) 
  11. Bake the financiers for 8-18 minutes, depending on your oven, the depth and size of your molds, and/or the position of your oven rack. (I found that I had to lower the temperature of my oven to evenly bake my financiers and prevent the bottoms from browning much quicker than the tops. I set my oven at 320 and baked them for 15-18 minutes and kept a close watch as they baked, until they were a perfect golden brown)
These are the best, eaten warm and just freshly baked. They are very hard to stop eating because the flavor creates an obsession.

You can serve these with fresh fruit, whipped cream, caramel sauce, chocolate ganache, jams and jellies, honey, ice cream, or Luxardo cherries.

Bon appétit!


Sunday, June 27, 2010

Nama Chocolates: A Chocolate Velvet Sensation


Nama chocolates have been popular in Japan since the 1980s, but now the chocolates are becoming known in other parts of the world, and they've become an exotic hit in chocolate circles full of avid chocolate aficionados. Well-known purveyors of the chocolate are Japanese shops such as ROYCE' chocolates and Heavenly Chocolates (in the Philippines). The latter has various outlets, all located in Asia.

What are Nama chocolates and why are they so special? Well Nama chocolates are Asian chocolate confections made with at least 20-25% fresh cream. In order to maintain the fragile texture of the chocolate, they must be kept refrigerated or chilled, at a particular temperature. Shops will often sell the chocolates sealed in air-tight packaging accompanied with dry ice packs, and merchants will recommend eating the chocolates sooner than much later. They are said to perish rather quickly.

Some people describe Nama chocolate squares more as molded pieces of chocolate ganache (due to the high cream content) than a traditional chocolate. As for what it's like to eat them? I've read that the tactile experience of eating a Nama chocolate is literally a melt-in-your-mouth sensation with an instant, although mild and creamy, flavor release. Chocolate velvet comes to mind.


Nama in Japanese means "fresh, raw or rare," but most translate the term in English as meaning "fresh". This obviously refers to the use of fresh cream in the confection.

I've never tried them, but now they are on my must-taste to-do list. This means I'll need to try them someplace local that sells them freshly made, if there are any such places around Los Angeles, buy them on-line, if possible, for a premium price, or I will have to wait until I can travel to Asia and taste them from one of the popular chocolatier shops that sells them. Some places will claim to sell Nama chocolates, but I've heard that they'll incorporate other ingredients such as vegetable oil and various stabilizers, so you'll have to discern where you buy them. I figure, if I am going to try such an unusual treat, I want to experience it properly, and go to the right source to get that ultimate experience.

I first heard about Nama chocolates in Desserts Magazine, however the version of Nama chocolates featured was made with high quality green tea and alternatively referred to as "Japanese fudge". These are sold in such shops such as Kyotofu, a Japanese bakery located in New York City, which features an on-line store. I am not sure how different these are from the traditional Nama chocolates I've seen otherwise, but I'd love to try these, too. I'm a huge fan with anything involving green tea.

Saturday, June 26, 2010

Baking Adventure 11: Seductive Apple-Cinnamon Sticky Buns


These sticky buns are intensely delicious. I guarantee that they won't last long in any household after baking them.

Saddled between their rolled, buttery dough layers is a filling of tender bits of fresh, chopped, tangy-sweet green apple submerged in an addictive and decadent, ginger-enriched, cinnamon-loaded, brown sugar sauce. The buns are topped with an amazing brown sugar glaze made with cream, butter, honey, vanilla bean paste, and moist, molasses-kissed, golden-brown sugar.

Indeed, these buns are rich. In my view, that's the way they are meant to and should be for the best flavor.

I innovated a bit on the recipe listed much further below. For one, as you can see, I used green apple in my filling.

The buns came out just the right texture, coloring, and flavor; in other words, they were a domestic success!

I snapped a few more photos of the buns in a pre-bake, post-bake/pre-glaze, and post-glaze mode. Next time, I will take some photos during the dough prep stages. I really had an interesting but fun time with the process.


When I first made the sticky buns, I realized that my mixer never came with paddle attachments, and I don't have a bread machine at home that I can just casually walk away from, after having dumped all of the dough ingredients in to blend. Lazy luxury, for sure. But somehow, less fun and engaging.

So, I did use my hand mixer to blend in the eggs, salt and buttermilk, once preparing the dough, but I realized that I could not use my hand mixer beater attachments for developing the dough. I figured that before there were any of these gadgets around, historically, dough for sticky buns and rolls were made by hand, so why couldn't I make them that way? I did just that, after adding in the rest of the ingredients for the dough. I watched the clock in my kitchen and began shaping and preparing the dough in my hands thoroughly for a good 5 minutes until it became a very nice texture that looked just about ready for the next stage of prep: rising. Now, looking back, I am glad I resorted to using my hands because my time with the dough was more intimate and appreciative.

I had some concerns about whether or not my dough was going to come out well, however. I thought that if my dough began to rise as it should in the next 2 hours, then that was a sign of being on the right path. My dough surely began puffing up with proud arrogance and I felt a twinge of joy at the sight. Little pleasures like these are always so wonderful and fulfilling, simple as they are.

As the dough size swelled, I busied myself with preparing the filling and the glaze. I had decided earlier on that I'd make an apple-cinnamon filling, although the recipe didn't call for the company of apples. Basically, you can use any filling you want. I had several ideas in mind, especially very unusual ones, but wanted to start with this classic flavor profile, since it was my first time making sticky buns at home, and not in a workshop setting. I also used vanilla bean paste wherever vanilla extract was referenced in the recipe. I find the flavor of vanilla bean paste to be more potent and aromatic because the seeds are still intact. The best choice of all would be to use vanilla bean pods, but I currently do not have a supply of them.
Inside Info: Here's a great resource to order them -- Vanilla Saffron Imports. This site was referred to me by a good friend, and with vanilla being the second most expensive spice in the world, the prices offered are a good deal here.
Once the filling was complete and the dough was rolled out and flattened, I spread the filling generously over the surface of the dough, leaving an inch bare at the top. I carefully rolled the dough into a log and began cutting slices and putting them in the baking pan, which I had some poured glazed into. I had prepared a 12 x 12 x 2 inch square baking pan with parchment paper, leaving flaps of parchment paper on each side, so that I could immediately lift the congregation of buns out of the pan once they were eventually done baking. I didn't bother leaving space between each bun because I like when they are loving, social, and affectionate with one another. In my world, sticky buns should stick together and then be pulled apart.

I also added the rest of the glaze to the tops of the buns, 10 minutes after being out of the oven. This is when they truly came alive and began to bellow out a chorus of sticky, sugary allegiance.

Recipe: Adapted from Gourmandise Desserts

Sticky Buns

Basic Yeast Dough:

3 Eggs
2 tbsps heavy cream
1 tsp salt 
4 cups flour
3/4 cup buttermilk
1/4 cup sugar
1 pouch yeast
6 tbsps (3/4 stick) butter, melted

  1. Place the eggs and salt in the bowl of a stand mixer and whisk until the eggs come together (when the yolks and whites are unified). 
  2. Whisk in buttermilk
  3. Using paddle attachment, add heavy cream, butter, sugar, and yeast and mix with paddle until combined.
  4. Add 2 cups of flour and mix until just combined. 
  5. Add the remaining flour and mix for 5 minutes.
  6. Spread a thin coat of oil in a large bowl and place the dough inside
  7. Wrap the bowl in plastic and place in a warm area. Let the dough double in size, about 2 hours
  8. Coat your rolling surface with a thin coat of flour. Roll out the dough in 18 x 14" rectangle
  9. Spread desired filling on the dough, leaving a little less than an inch up top to seal
  10. Roll up the dough from the bottom to top and seal on top by pinching the seam
  11. Cut rolls in desired thickness with a sharp knife or scissors, and place at least 1" apart in baking pan. (I decided to place the buns close together)
  12. Wrap baking pan in plastic and let rise for another 1.5 hours
  13. Baking at 350 until puffy and golden brown around the edges
  14. Top with desired glaze, 10 minutes after removing buns from the oven

Glaze For Sticky Buns

1.5 sticks of butter
1/2 cup heavy cream
1 tsp vanilla
1/4 cup honey (experiment with honey flavors or use agave nectar)
1 and 1/4 cups brown sugar
1/4 tsp salt (not necessary if you are using salted butter, so I left the salt out)

  1. Place all ingredients in a sauce pot. Cook over medium heat until very warm, but do not boil
  2. Pour 2/3 of the glaze on the bottom of the pan. Reserve the remainder of the glaze to pour over the buns once they are baked.

Filling For Sticky Buns

3/4 cup brown sugar
1 tsp cinnamon
Pinch of salt (again not necessary if using salted butter)
1 tbsps melted butter
1 tsp ginger

  1. Melt the butter. Add the remaining ingredients and mix with a fork
  2. Spread the filling over the dough and roll up as directed


Friday, June 25, 2010

A Sweet and Savory Trip to Surfas

I think I've briefly mentioned Surfas on my blog before. Basically, Surfas is like a Toys "R" Us for serious foodies, cooking/baking enthusiasts, and food business professionals. This store was originally only open to food professionals but eventually began opening its doors to the general public, so this culinary fun house caters to business people and everyday, serious cooks alike.

You'll find: imported cheeses, rices, an expansive selection of high quality chocolates, nut flours, packaging supplies, kitchenware (especially commercial),  unusual and common honeys, various savory condiments, fruit powders, cake decorations, flavor/oil extracts, a huge inventory of bakeware, display cases, chef wear, flatware, a bevvy of ethnic cooking ingredients, books, storage, cooking utensils, bulk spices, tea and coffee blends, pastry dough prep, vinegars and oils and much, much more.

I love Sur la Table, but at Surfas, you can order and buy in bulk and you'll find better prices for bulk purchases. Surfas also features a cute, little, quaint cafe, called Cafe Surfas, that serves organic and local dishes and treats. Local classes and workshops for both savory cooking and baking are held at Surfas weekly.

I also think that every city should have a place equivalent to Surfas in town. If you don't, you're missing out. Many people who visit Surfas, both in and out of town, often look for a place like Surfas in different areas.

Surfas is located in the culinary district of downtown Culver City in Los Angeles county. There's so much to see in this corner supply store, from specialty supplies and ingredients to anything you'd want for both savory and sweet recipes. 

 This is one side of Surfas near the street, where the cafe is

I've wanted to snap some photos of Surfas for a good while, but in my previous visits, I was so busy scouting for supplies and ingredients for my baking and cooking adventures, that I forgot to gather images. I also worried about the legal parameters of taking photos in commercial environments. I am still learning about the ins and outs of food photography, and photography and food writing.

Seems to be OK, unless a no-photo policy is specifically listed on a storefront's premises. I finally got a chance to snap photos yesterday, while on break, during a macarons and financiers workshop (I'll be updating on this soon, too). Keep in mind that the photos I've taken display only a smidgen of what's available in the store.

Now that I think about it, I also wish I snapped some photos of the cafe area, if I could have. Next time, I will, if applicable. Click on any of the photos in the set to see larger versions.


So, there you have it -- many of the photos of I got to take at Surfas. Seriously, if you aren't a West L.A native, if you are ever in town and want to do some shopping for food supplies and items, you have to stop by this shop and take a look for yourself and see how grand it is.

Surfas Restaurant Supply & Gourmet Food
8777 W Washington Blvd
Culver City, CA 90232

The shop used to have a dedicated website, but the owners owners of the supply shop also have a storefront in Arkansas under the name of Culinary District. So Surfas Online now redirects to the website for Culinary District. There is still a placeholder on the URL for Surfas: SurfasOnline.com

Tuesday, June 22, 2010

Dreaming of Bleeding Turnips and Travel Faeries

I've been enjoying my constant and steady exploration into the world of professional cooking, I am not quite there yet, but I am slowly building a foundation, which I'm thrilled about. I've got some volunteer bakery work lined up, I study and research daily on all things related to food, and I am constantly looking for opportunities to grow and learn, especially if they are hands-on.

Culinary school will have to wait, and I am OK with that. It will happen in time.

One thing I vowed to do not long ago was to look into attending food events, venues, and conferences, as often as I could afford it. I have yet to attend one and in the meantime, I am like a wide-eyed, mad cat at the window, trapped in the house, going crazy looking at all of the plump, fat mice scurrying around on the sidewalk that I can only dream of catching.

Crazy metaphor, but it describes my intense desire to get out and weave an exciting web of culinary travel experiences. There's so much going on, in and around my city and on the west coast of the states. I'd like to go beyond these boundaries, but that's more expensive. Culinary travel is the best way to learn and become seasoned (pun intended) in the world of food and drink!

My problem is that I have limited and tight finances, as of late. Yeah, I am one of millions of victims of this shoddy economic downturn. My mom often likes to say, "You can't get blood from a turnip," when an option is not possible, at the moment. It's kind of a freaky saying because odd visuals of mysterious blood leaking from the surface skin of turnips come to mind. Either that, or I begin to imagine a strange vegetarian vampire sinking his or her sharp, fang-like teeth into the firm, hard, dirt-speckled, earthy body of a freshly pulled turnip, only to be disappointed that there's absolutely NO blood contained in the dang thing to draw out!

*Shudders*

However, I find myself liking the saying. I know...it's a sick, sad world.

There's a fantastic event coming up that I am aching to get to. I just have to prepare the proper amount of finances to attend. There's airfare, hotel expense, spending cash, and a registration fee to consider.

The event is called The International Food Blogger Conference.

International Food Bloggers Conference 2010
Foodista and Zephyr Adventures co-host the event and it's held in Seattle. This looks to be, I assume, their 2nd annual event. I noted an archive from 2009, but nothing archived before last year.

It costs 350 dollars to register and it's a fully-packed, 3-day conference. Authors, magazine editors, publishing companies, food bloggers and writers, lots of fellow foodies, an insane amount of food and dessert, and a horde of panel speakers and guests will all be there. Oh-em-gee!

I found a YouTube video for last year's event.


Looking at this video made me even more eager to attend. I am just concerned about being able to register in time so that I can attend before all spots are sold out. Since the event is in August (late August that is), if I'm able to register, I'll worry about the rest of the finances later, as there's time to prepare. Better to get a spot in, if possible, than to lose out on the opportunity completely. There's always next year, but I can't wait!

Attending this event would be my first, and it would be a great foray into making connections in the food and food writing industry. Along with growing as an aspiring pastry chef, I want to seriously establish myself as a food writer. 

The travel faery must come through for me. I'm so counting on it.

Saturday, June 19, 2010

Baking Adventure 10: Toffee-Topped Granola Treats

For starters, this isn't technically a baking adventure, as I didn't have to bake anything to make these desserts. However, I did wind up cooking and working with sugar mixtures on the stove to develop both the thick marshmallow sauce and the candy crusting of the toffee dispersed randomly atop the granola squares.


These squares turned out rather tasty and buttery - very shabby chic. The nutty, "honeyfied", addictive, starchy-oat blend of the granola from Quaker Granola Oats & Honey cereal is a superior substitute and flavor over the usual Rice Krispies cereal. Note that I never claimed healthy was among all of those great elements I described.

I guess you can call these Rice Krispies treats for adults.


*Available at most supermarket chains in the cereal aisle. I also recommend Cafe Fanny Granola, which is the second image; more expensive but madly good and awesome with vanilla almond milk or organic soy milk.

With all of this said, I will still always have a soft heart for the classic Rice Krispies treats recipe I remember as a child. Who doesn't?

The marshmallow cream sauce was very simple to make and is better than store-bought options, whether it be Marshmallow Fluff in a jar or marshmallows from a bag. I used sugar, a tad of heavy cream, gelatin, butter, light corn syrup, vanilla bean paste, and water to make my marshmallow sauce. It came out to a thick, gooey, and creamy consistency and held the granola together well as it cooled in a long, buttered, dark, low profile baking pan.

To spread out the granola marshmallow mix, I coated my hands in semi-melted butter so that my fingers would not stick to the flattened uncut batter as I shaped it along the pan.

As that was cooling, I took some brown sugar and began caramelizing it in a small pot, on low heat, on the stove. When the brown sugar was fully melted, I added in butter and let that absorb evenly into the mixture by stirring. I added in vanilla bean extract and a shot of rum liquor. I stirred again, and took the mixture off the stove. I poured in a small amount of heavy cream and the mixture began to spit and argue, but in an ecstatic manner. This means it was singing praises and enjoyed everything I added to it. I was ready, very quickly I might add, to spread the toffee mixture randomly over the granola batter. I had to work fast as the toffee candy began to stiffen and set up as each second progressed.

The toffee set nicely over the granola batter and eventually I was ready to cut the batter into squares and place them upon a light beige ceramic dish...for display and the inevitable appearance of grabbing hands.

Baking Adventure 9: Fudgerrific Brownies


^ Two fudge brownies stacked in a glass bowl


^ A batch of fudge brownies on a platter

These brownies are topped with a fudge coating. They're super rich and the chocolate content is high. If you don't like chocolate much or if you are worried about calories and your weight or you react oddly to chocolate like myself (although that seems to never stop me from indulging like a mad woman), then stay away from this recipe!

As mentioned previously, I used the recipe from The Waspy Redheads's blog: LINK

You can try your hand at these hedonistic brownies by following the recipe within her link.

My fudge layer came out a bit differently. The top is a smooth, fudgy, matte finish with a velvety look and texture and my fudge layer is not as thick. I used salted butter for the chocolate ganache layer which gives the flavor a distinctive blend of salty and sweet. Next time, I'd like to have a thicker layer like The Waspy Redhead, so I'll be making a much larger batter in a higher pan so that there's more room for a fatter layer of ganache.

I thought about adding Nutella to the batter mix, but next time I will experiment more with variations in flavor.

Caramel, praline, butterscotch or peanut butter tops would be exquisite . The choices are endless, especially the more exotic and "outside the box" you get with ingredient experimentation.

Some unusual flavors to incorporate into this recipe would be:
  • Blueberry
  • Macadamia nut butter 
  • Maple fudge and candied bits of bacon (if you dare...or care)
  • Blend of sweet spices, cayenne pepper and your choice of a heady liqueur
  • Green tea
  • Mango curd or mousse
  • Sweet potato pie (as a top layer)
  • Gingerbread (perhaps as a custom ganache or as a top, dense bar layer to the brownie)
  • Kumquat ganache or mousseline

Friday, June 18, 2010

Happy Baking Time!

Today, I finally got around to getting some groceries for a few baking projects.

I've been budgeting a great deal lately, so spending has been very limited and when you are someone who loves to bake and cook as much as I do, money is definitely a necessity in abundance, because I'm always exploring recipes and ideas in the kitchen otherwise.

Tonight, I am trying out this ooey gooey, decadent brownie recipe that I discovered on this blog several months ago - The Waspy Redhead. I first came across this entry when I was looking around online for ideas for my redheads baking project (the red head equivalent to brownies and blondies). I will have to bake these again and document them for this blog, so you can see the delicious and scarlet results.

Anyway, when it comes to brownies, I really enjoy a fudge-textured brownie. Cake-like brownies are OK as I certainly would not turn them away, but chewy, moist, buttery, and dense brownies are the best, especially with a ganache fudge top. They feel like a real brownie, whereas a cake-like brownie reminds me simply of smaller and denser pieces of chocolate cake.

Tomorrow, I will be making oatmeal granola treats (as squares). Instead of using Rice Krispies, I'll be using granola. These are pretty simple to make with a thick marshmallow cream sauce used to hold together the granola, as the bars cool.

On Sunday, I will be making cinnamon sticky buns with a spiced glaze, as I've promised.

I'd also like to share with you three little amazing booklets that I received as gifts from an aunt recently. She knows how much I am into baking/cooking and dessert and sugar table design (I can't wait to explore further with this area of design), as well as baked goods gift packaging and ideas.

I fully recommend this cute little series of titles.


The booklets are published by CQ Products. You can purchase the books on their site directly or find the books on retail sites such as Amazon.com.